
How To Prepare and Shoot a Screen Printing Screen
You’ve got the design ideas, but now it’s time to turn them into tangible products! If you’re interested in screen printing, you’ll need to start by shooting a screen.
You don’t need to be a tech guru to do this—you just need the right supplies and a few simple instructions. We’ll help you get there by walking you through the entire process of prepping the screen, applying your design, and finally testing and curing the film.
We’re so excited to help people create fantastic one-of-a-kind products! So let’s get started on building your perfect screen!
What You’ll Need to Get Started
Here’s what you need to get started on shooting a screen:
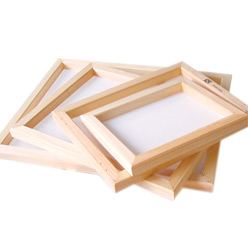
- Screen – This is a frame-like mold which will contain the design for the fabric, paper, or other material that will be printed on.
- Emulsion – A photosensitive liquid chemical substance used to coat screens and capture the desired design.
- Exposure Unit or Light Box – An integrated light source with several bulbs used for exposing designs onto screens.
- Water-based Ink – Used to print onto materials like fabrics, wood, and paper.
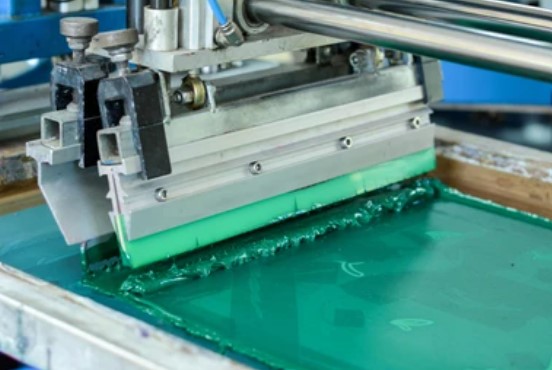
- Squeegee – A tool that helps push ink through the screen and onto the material being printed.
Once you have all of these tools gathered together, you can move onto prepping the screens with your emulsion and uploading images into the exposure unit!
Prepping the Screen
Prepping the screen is one of the most important steps in screen printing. After all, a properly prepped screen allows for an even application of ink—which means beautiful, crisp prints!
To prepare the screen, you’ll need to make sure it’s free from any dirt or dust particles that could cause imperfections in your prints. To do this, you’ll use a wire brush or a paint scraper to remove any impurities. Once you’ve done that, wipe down the frame with a cloth and isopropyl alcohol to make sure it’s completely clean.
Next up is coating the mesh with a light-sensitive emulsion. This should be applied in multiple layers with a scoop coater, until there’s an even coating over the entire mesh. Once that’s finished, you can expose your image to UV light and let your newly-coated screen sit for about 15 minutes—or until the emulsion has completely hardened and dried.
Once it’s ready, rinse off the unexposed emulsion with water and you’ve just successfully prepped your screen for printing!
Coating the Mesh With Emulsion
Now you’re ready to coat your mesh with emulsion! This sets the stage for exposing the screen to light, so it’s an incredibly important step.
To begin, make sure you’re working in a darkroom or a similarly lit area. Then, pour a generous amount of pre-sensitized emulsion into the scoop coater. Before starting to coat the mesh, squeeze out any excess liquid.
Cover the Frame Evenly
Slowly and steadily, apply even pressure as you cover the frame with emulsion. Aim for an even coating that’s between 0.001 and 0.002 inches thick – too thin, and it won’t block UV light; too thick, and it won’t fully expose during exposure time!
Let It Dry
Once you’ve applied the emulsion to your mesh frame, let it dry – usually overnight – until it’s no longer tacky before moving on to exposure. If there’s still moisture present in your screen, that can affect future prints – so be patient and give it time to dry properly.
Exposing the Photosensitive Image
It’s now time to expose the photosensitive image that you have just applied onto your screen – which requires you to bring the artwork, the screen and an exposure unit into play.
Placing the Screen
Place the screen on a flat, horizontal surface and make sure it is centered securely with no surface areas wobbling.
Positioning the Artwork on the Screen
Position your artwork under the screen so that it lines up with where your image should be displayed. Securely clip it in place so that it doesn’t move out of position during the exposure process.
Exposing the Photosensitive Image
You are now ready to place your screen into an exposure unit, which is a device that projects ultra-violet light through a transparency film and onto your photosensitive coating to burn your image onto the mesh of your screen. The exposure time and intensity of light used will depend on what type of emulsion you have used, so be sure to read those instructions carefully!
Testing for Proper Exposure
Testing for proper exposure is just as important when it comes to screen printing. To do this, you need to first coat the unexposed parts of the screen with a water-soluble blockout. Once that’s done, you’ll expose the coated areas under a UV light and then rinse out the rest of the emulsion that was blocked out.
But here’s where things can get tricky: you’ll need to know how long to expose your screen in order to get a good result. Too much and your edges will be too hard, resulting in misprints and clogged screens; too little and your images won’t be clear.
Fortunately, there are several ways you can test for proper exposure:
- Using a timer to measure each exposure step
- Spot testing – exposing a small area of the screen under a UV light
- Checking back on exposed screens at shorter intervals of time
- Testing with different images, colors, and ink types
By following these steps, your prints will turn out beautiful every time!
Washing Out the Image
You already know that pre-prepared screens are the way to go if you want quality results—but you’ll still need to properly wash out the image if you’re looking for your print to be truly crisp. Here’s a step-by-step guide on how to wash out your screen!
Gather Supplies
You’ll need some basic supplies for this washout process, including: a pressure washer, a hose or sprayer, screen printing emulsion remover, a scrub brush and the screen itself.
Prep Your Space
The next step is to set your workspace up for success by making sure everything is clean and clear of obstacles. Don’t forget that you’ll also want to lay down some plastic sheeting or tarp to protect your floors from spills!
Spray Away!
Once everything is prepped, it’s time for the real work to begin. First, make sure the screen is laying flat on the tarp or plastic sheeting. Once it’s secure, start spraying it with the pressure washer—but not too close! You’ll just want a gentle spray of water at first, then move on to scrubbing with the brush in circular motions until all of the emulsion residue has been removed.
Finish Up
Once you’ve finished scrubbing off all of the emulsion residue, give your screen one last spray with the pressure washer and allow it time to dry completely before moving onto printing!
Conclusion
Shooting a screen for screen printing can be intimidating, but don’t worry—you can do it! With the knowledge and supplies you need, you will be able to prepare and shoot a successful screen with ease. Begin by prepping your screen with a borax solution, then apply emulsion and allowed it to dry before exposing your image with a UV light. Once your image is exposed, you can wash it off and coat it with Photocoat to seal the screen.
By following these steps, you’ll be able to produce professional-grade screens and turn your creative vision into a stunning reality. Now you have everything you need to become a master of screen preparation and shooting every time you print. Get out there and start printing!
Bor Systems Kenya Limited has extensive experience developing and integrating high-quality screen printing designs. With over 10 years of experience in the Printing and branding Industry, we are certain we know what we do and excel in it.
Contact us at +254728969484 or at support@borsystemslimited.com to see how we can help you.