
Get Started With Screen Printing Now: Step-by-Step Guide
Looking to dive confidently into the world of screen printing? Look no further! This guide will walk you through the basics of screen printing, giving you all the tools and information you need to get started.
Screen printing is a great way to create custom-printed shirts, posters, and other products with beautiful designs. It can be an incredible outlet for self-expression, creating unique artwork that is sure to stand out. Plus, it’s a fun and rewarding process!
In this guide, we’ll cover everything from the fundamentals of design and how to choose the right equipment, to preparing your stencils and screens and how to use them to get great results. We’ll also share some tips on troubleshooting as well as additional resources for further learning.
So if you’re ready to explore the wonderful world of screen printing—or even if you just want a refresher—let’s get started!
What Is Screen Printing?
Do you want to learn how to make your own custom t-shirts? Screen printing is the way to go! Screen printing, also known as silk screening, is a method by which ink is transferred from a stencil onto fabric, paper or other materials. It is an economical and versatile way to produce colorful graphic designs in large quantities. Whether you’re printing for yourself or for your business, here’s how to get started:
- Choose a design: Select the artwork that best fits your project. It can be just about anything—from family photos and logos to cartoons and large-format graphics.
- Create a screen: Make an image of your design on the screen using emulsion and light. This process involves coating the screen with positive images taken from digital artwork.
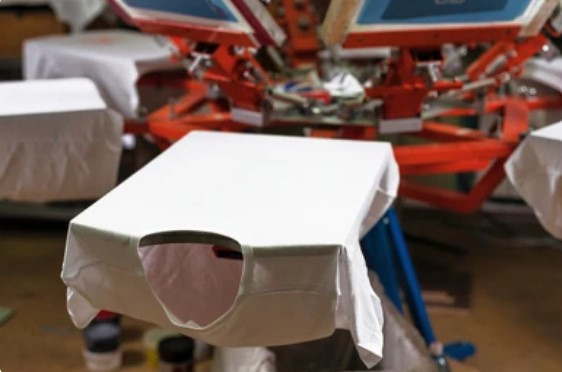
- Print with ink: Position your fabric on the press bed then align it with the screen frame. You may use different inks depending on what type of fabric you are working with.
Now that you know what screen printing is all about, it’s time to put all these steps into action!
Choosing the Right Design for Screen Printing
Now it’s time to pick the perfect design for your screen printing project! Whether you’re looking to create a one-of-a-kind work of art or reproduce a logo for a corporate event, you’ll need to consider a few things before you get started.
For starters, think about the size and scale of the design. The larger you make it, the easier it will be to see the details on a shirt or banner. You’ll also want to think about color – if you’re using multiple colors in your design, make sure they’re well-balanced and contrast each other nicely. Finally, consider the complexity of your artwork – if there are too many intricate details or details that are too small, they may not show up properly when printed.
When it comes to picking the right design for your screen printing project, no matter what you choose, following these few tips will help ensure that your finished product looks fantastic!
Preparing the Image for Print
Do you want to get started with screen printing but don’t know where to begin? Well, you’re in the right place!
The third step to successful screen printing is preparing the image for print; once you have your emulsion processed and ready, it’s time to prep the design. Here’s how:
- Choose your design – For the best results, the design for screen printing needs to be quite simple. Avoid intricate details and aim for bold lines and shapes.
- Adjust color – Make sure your colors are all CMYK-compliant and that you have a separate layer for each color you’re incorporating in your design.
- Convert to Bitmap – When you’ve arranged your layers correctly, it’s time to convert your file into a bitmap format so that it can be printed on the emulsion; TIF or BMP are two popular options.
- Prepare film positives – Now that your file is ready, create film positives of each layer so that they can be added onto the emulsion-coated screens. Keep in mind, too, that this is when color separations take place: each layer contains only one color and prints separately on the fabric or paper!
See? Preparing an image for screen printing isn’t as daunting as it seems; so why not give it a go today?
Setting Up the Screen and Exposure Process
Ready to get started with screen printing? Great! Now, it’s time to set up the screen and exposure process.
There are a few steps to this, so let’s break it down:
Printing Screen and Frame
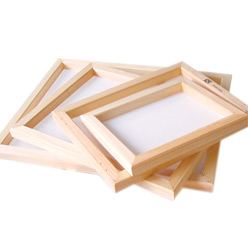
The first step is to prep the screen frame and select your printing screen. You’ll want to make sure you have the correct mesh count for your project and that it’s properly tensioned in the frame before moving forward.
Coating Your Screen
Next, you’ll need to apply a photosensitive emulsion or coating to your printing screen. You can use a scoop coater or an emulsion-coating machine for this process – whatever works best for you! Make sure each side of the screen is evenly coated and completely dried before proceeding.
Exposing the Image
Now it’s time to expose your image onto the printing screen. This requires a film positive of your image placed on top of the coated printing screen and is typically done on an exposure machine, which will create a stencil of your desired design onto your emulsion-coated printing screen. After this process is complete, you can wash away any unexposed emulsion with water or a special cleaner, leaving behind only your stenciled design on the film positive
Congratulations! You’ve just set up the entire screening process – now, it’s time for some printmaking fun!
Adding Coatings to the Screen
Ready to get started with screen printing? One of the best parts of the process is applying coatings to your screen! This is what will determine how vibrant and durable your prints are.
There are several types of coatings you can use, but we recommend Plastisol as a great starting point. Plastisol offers excellent coverage and opacity, so it’s great for both light and dark garments. It’s also very user-friendly, which means anybody can get started with it quickly.
But don’t worry – there are other options that you can explore later on when you’re more comfortable:
- Water-based inks: These inks dry quickly and they’re perfect if you need to achieve a soft feel on garments.
- Discharge inks: They provide excellent print clarity and they’re great for achieving strong color vibrancy on dark garments.
- Specialty inks: These are perfect when you need to create something really unique with your prints, such as fluorescent or metallic effects.
Whatever type of coating you choose, make sure to test it out on a fabric sample before actually printing anything! This way, you will know exactly how the final product will turn out—and there won’t be any surprises down the line.
Print and Cleanup: Completing Your Design
You’re almost finished! It’s time to take your design from the sketchbook to reality with a few more steps of printing and cleanup.
Printing
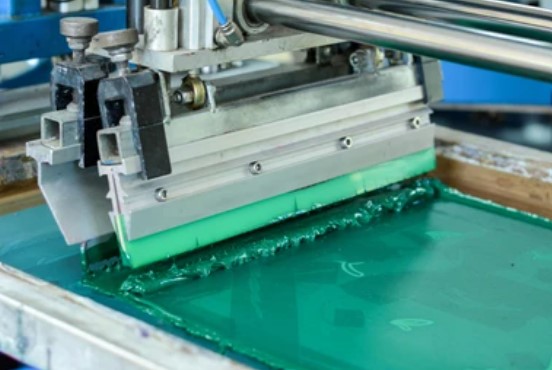
To begin, it’s important to make sure your design is aligned correctly onto the screen or material you plan to use. You can use an alignment tool called a “registration guide” or a grid system to help place your design accurately. Once you’re sure everything looks correct, you can start printing!
For the actual printing process, you’ll need:
- Screen printing press
- Ink
- Squeegee
- Stencil emulsion
- Specialty items like Masking Tape and Paper Towels
Before each print, it’s also important to do a test print on a piece of scrap paper – this will help you get used to the feel of screen printing and make sure your colors are correct.
Cleanup
Once you’ve finished printing your design, it’s time for cleanup! This includes:
- Rinsing the screen with water and then using special cleaners to completely remove the ink from the surface of the screen.
- Removing any excess ink from other surfaces by using paper towels and cleaning agents.
- Allowing any excess cleaning solution or ink to dry before storing or reusing either item.
By taking all of these steps into consideration, you’ll be well on your way to completing beautiful prints that will stand up against time!
Conclusion
Screen printing is an exciting, creative outlet with endless possibilities. Whether you are creating t-shirts for your own brand or experimenting with different inks and designs, you can create stunning pieces of work. With the right materials and a little patience, you can successfully get started with screen printing with this step-by-step guide. So what are you waiting for? Start experimenting and create something special today!